
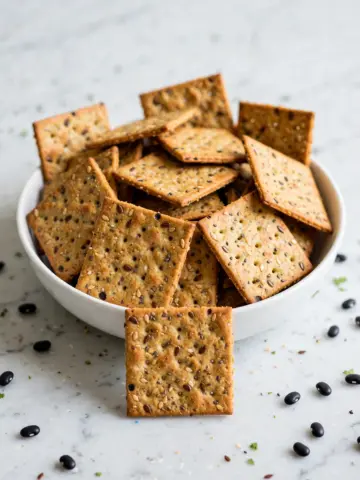
If you have been searching for a snack that is both irresistibly crunchy and wonderfully flavorful, look no further than this Homemade Crispy Pita Chips Recipe. It’s incredibly easy and satisfying to make your own pita chips at home. These chips come out perfectly golden and crisp without frying, making them a healthier and tastier alternative to store-bought versions. The beauty of this recipe lies in its simplicity—just a handful of ingredients coming together to create a snack that’s excellent on its own or paired with your favorite dips. Trust me, once you try making these pita chips yourself, you won’t want to go back to prepackaged versions ever again.
Ingredients You'll Need

Getting started with this recipe is a breeze because it calls for simple, everyday ingredients that you most likely already have in your pantry. Each one plays a vital role: the pita bread provides a sturdy but light base, olive oil helps achieve that perfect crunch and golden color, while the salt and optional seasonings bring out beautiful layers of flavor and aroma.
- 4 pita breads (5 to 8 inches in diameter), whole wheat or regular: Choose fresh or day-old pita for the best texture; whole wheat adds a nice nuttiness.
- 2 to 3 tablespoons olive oil, as needed: This gives the chips their crispy, golden finish and a subtle fruity flavor.
- 1 teaspoon flaky sea salt or kosher salt: Essential for that perfect seasoning punch, flaky salt adds delightful crunch too.
- Optional additional seasonings (za’atar, sesame seeds, dried oregano, dried minced onion or garlic): Customize your chips with these to add extra layers of exotic or aromatic flavors.
How to Make Homemade Crispy Pita Chips Recipe
Step 1: Prepare the Oven and Pitas
Before you get started, preheat your oven to 350 degrees Fahrenheit, and set two racks within the middle and upper third positions to ensure even baking. Lining two large rimmed baking sheets with parchment paper makes cleanup a dream and prevents the chips from sticking. Then, take your pita breads and carefully cut along their outer edge with kitchen shears, separating each pita into two thin rounds—this layering is the secret to having those perfectly crispy chips.
Step 2: Oil and Season
Working with one pita round at a time, brush the smooth side lightly with olive oil, then flip it over to brush the rough side generously. This double-sided oiling locks in moisture and promises maximum crunch. After oiling, sprinkle the chips with flaky salt and choose from optional seasonings like za’atar or sesame seeds for a fun twist—crushing flaky salt between your fingers breaks larger pieces into bite-sized crystals that evenly coat the chips.
Step 3: Cut into Wedges
Once all the rounds are seasoned, stack them and divide into two piles to make slicing easier. Use a sharp chef’s knife to cut each pita stack into 8 wedges, so you get perfect little chip-sized pieces that bake evenly. Spreading them out on the baking sheets with the rough side facing up ensures each wedge crisps beautifully.
Step 4: Bake the Pita Chips
Bake the chips for about 10 to 12 minutes, switching the sheet pans between the racks halfway through to promote even browning. Keep an eye on them as the pan on the top rack often finishes first; the other might need a couple more minutes to reach that gorgeous golden-brown crunch. Letting the chips cool completely on the pans locks in their crisp texture, so don’t rush the process!
How to Serve Homemade Crispy Pita Chips Recipe

Garnishes
While these chips shine on their own, sprucing them up with a light dusting of fresh herbs like parsley or a sprinkle of sumac can brighten their flavor and make for a stunning presentation. Thinly sliced green onions or a dash of smoked paprika offer a colorful, zesty touch that will impress your guests.
Side Dishes
Homemade crispy pita chips are the ideal crunchy companion for a vast array of dips and sides. Think creamy hummus, tangy tzatziki, or a rich baba ganoush. They also pair wonderfully with fresh vegetable crudités or a vibrant Mediterranean salad, bringing a perfect balance of texture and flavor to your meal.
Creative Ways to Present
For parties, serve your pita chips layered in a rustic wooden bowl lined with a colorful cloth napkin to give a warm, inviting vibe. For a more casual snack, arrange the wedges around a small dish of your signature dip on a platter, or stack them alongside cheese and charcuterie for a Mediterranean-inspired spread that will be the star of any gathering.
Make Ahead and Storage
Storing Leftovers
If you happen to have leftovers, sealing them in an airtight bag with as much air removed as possible keeps them crisp at room temperature for up to two weeks. It’s remarkable how well they hold their crunch, making this recipe perfect for snack prepping or last-minute entertaining.
Freezing
While freezing is possible, it’s not usually necessary due to the pita chips’ long shelf life. If you do freeze them, use an airtight container or heavy-duty freezer bag, and thaw at room temperature. Keep in mind that freezing might slightly soften the chips’ delicate crunch, so it’s best to enjoy them fresh when possible.
Reheating
If the chips lose a little crispness over time, a quick five-minute pop back into a 300-degree Fahrenheit oven will revive that delightful snap. Just spread them out on a baking sheet while reheating to ensure every wedge regains its signature crunch without burning.
FAQs
Can I use gluten-free pita bread for this recipe?
Absolutely! Using gluten-free pita works just as well, but you might want to check the thickness as some gluten-free options can be thinner and might crisp up faster. Adjust baking time accordingly for the best results.
What if I don’t have flaky sea salt?
Regular kosher salt or even fine salt can be used, but because flaky sea salt has a lighter texture and larger crystals, it adds a nice crunch. If you’re using finer salt, start with a bit less to avoid over-salting.
Can I make these chips without oil?
While olive oil greatly enhances the crispness and flavor, you could try a light spray of cooking oil. Without any oil at all, the chips will bake but may be less golden and not as crispy, so oil is highly recommended.
How long do homemade pita chips stay fresh?
When stored properly in an airtight container, these pita chips stay fresh and crispy for up to two weeks at room temperature. Just make sure they are completely cooled before storing to prevent sogginess.
Can I experiment with other seasonings?
Definitely! The beauty of this Homemade Crispy Pita Chips Recipe is its versatility. Try chili powder for a spicy kick, smoked paprika for warmth, or even cinnamon and sugar for a sweet twist. The possibilities are endless!
Final Thoughts
There is truly something special about making your own snacks from scratch, and this Homemade Crispy Pita Chips Recipe delivers that comforting satisfaction with ease and charm. Whether you're stocking up for a party, looking for a healthier snack, or just craving something deliciously crunchy, these pita chips are a guaranteed crowd-pleaser. So go ahead, grab that pita bread, and start baking—you’re about to fall in love with a new favorite snack.
Print
Homemade Crispy Pita Chips Recipe
- Total Time: 22 minutes
- Yield: 6 to 8 cups
- Diet: Vegan
Description
Make delicious homemade pita chips with this easy recipe that bakes pita bread into golden, crispy wedges. Perfect as a snack or paired with dips, these chips are seasoned simply with olive oil and sea salt, and you can customize them with your favorite herbs and spices. This baked, not fried, recipe yields 6 to 8 cups of crunchy pita chips.
Ingredients
Ingredients
- 4 pita breads (5 to 8 inches in diameter), whole wheat or regular
- 2 to 3 tablespoons olive oil, as needed
- 1 teaspoon flaky sea salt or kosher salt
- Optional additional seasonings: za’atar, sesame seeds, dried oregano, dried minced onion or garlic
Instructions
- Preheat and prepare baking sheets: Adjust two oven racks to the middle and upper third positions. Preheat the oven to 350°F (175°C). Line two large, rimmed baking sheets with parchment paper for easy clean-up.
- Separate pita rounds: Using kitchen shears, cut around the perimeter of each pita and separate each pita into two thin rounds. If separation is difficult, use a serrated knife to gently cut between the layers.
- Brush with oil and season: Working with one round at a time, brush the smooth side lightly with olive oil all over. Flip it over, brush the rough side generously with oil, then sprinkle lightly with salt and any optional seasonings. If using flaky salt, crush it between fingers to break up large pieces before sprinkling.
- Cut into wedges: Stack the prepared rounds and divide the stack in two for easier handling. Using a chef’s knife, cut each stack into 8 wedges.
- Arrange and bake: Spread the wedges, rough side up, in a single layer across the two baking sheets. Bake for 10 to 12 minutes, rotating and switching sheets halfway through to ensure even browning. The pan on the top rack may finish first; if so, leave the pan on the middle rack for a few extra minutes until all are equally golden and crisp.
- Cool before serving: For maximum crispness, allow pita chips to cool completely on the pans before serving. Store cooled chips in a sealed bag at room temperature for up to 2 weeks.
Notes
- You can customize the flavor by adding your favorite seasonings such as za’atar, sesame seeds, dried oregano, or minced garlic.
- Be sure to cool the chips completely on the baking sheets before storing to keep them crisp.
- Adjust olive oil quantity as needed to lightly coat pita slices without making them soggy.
- Use parchment paper on baking sheets to prevent sticking and make cleanup easier.
- Store pita chips in an airtight container or sealed bag at room temperature for up to 2 weeks.
- Prep Time: 10 minutes
- Cook Time: 12 minutes
- Category: Snack
- Method: Baking
- Cuisine: Mediterranean



Leave a Reply