
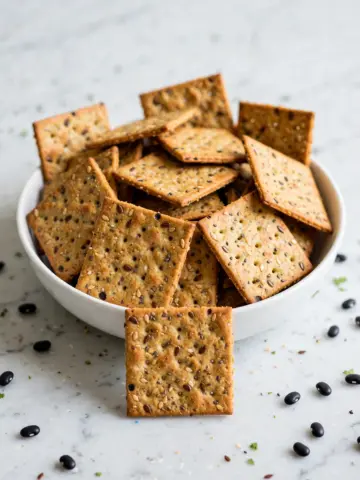
If you love snacks that are crunchy, flavorful, and guilt-free, then this Baked Chickpea Chips Recipe will quickly become your go-to treat. These chips are wonderfully crispy on the edges, light in texture, and bursting with the nutty richness of chickpea flour. What makes them truly special is how simple ingredients come together to create something that feels indulgent yet wholesome. Whether you’re craving a healthy snack or a fun appetizer for friends, these chips deliver that perfect balance of taste and nutrition with every bite.
Ingredients You'll Need

Gathering straightforward, pantry-staple ingredients is all you need to whip up these delightful chips. Each ingredient plays a key role in ensuring the perfect texture, flavor, and aroma that make this recipe stand out without complicating your kitchen routine.
- 80 grams chickpea flour: The star of the show, providing a rich, nutty flavor and a sturdy base for crispiness.
- 140 grams water: Just enough to create a smooth batter that easily spreads into thin, chip-shaped rounds.
- ½ teaspoon salt: Enhances the overall flavor and brightens the natural taste of chickpeas.
- Chopped fresh herbs, dried herbs, or spices: Adds your favorite flavor twist, from rosemary to smoked paprika, making every batch uniquely delicious.
How to Make Baked Chickpea Chips Recipe
Step 1: Preheat Your Oven
Begin by setting your oven to 200°C (or 400°F). A properly preheated oven ensures your chips crisp up evenly and turn that perfect golden brown without drying out.
Step 2: Mix the Batter
In a mixing bowl, combine chickpea flour, water, and salt. Whisk thoroughly until the batter becomes completely smooth and free of lumps. This simple step sets the foundation for the texture of your chips.
Step 3: Prepare Your Baking Sheets
Line two baking sheets with parchment paper. The parchment keeps the chips from sticking while making cleanup a breeze. It also helps the batter spread evenly without burning on the bottom.
Step 4: Spread the Batter
Spoon the chickpea batter onto the parchment-lined sheets. Use the back of the spoon or a spatula to gently spread the batter into thin, even circles—think about chip-size portions. Thinner spreads will yield crunchier chips.
Step 5: Add Your Favorite Flavors
Sprinkle fresh or dried herbs, or your chosen spices over the top of each chip before baking. This step brings an aromatic and flavorful dimension to the chips and lets you customize them to your mood or occasion.
Step 6: Bake Until Golden
Pop the trays into your preheated oven and bake for around 10 minutes, or until the edges of the chips have turned golden brown and crisp. Keep an eye on them to prevent burning, as ovens do vary.
Step 7: Cool Before Serving
Once baked, allow the chips to cool on the parchment for 15 to 20 minutes. Cooling lets them firm up perfectly for that satisfying crunch and makes it easier to peel them off without breaking.
Step 8: Enjoy!
Serve your baked chickpea chips with your favorite dips, or simply enjoy them as a flavorful, healthy snack on their own.
How to Serve Baked Chickpea Chips Recipe

Garnishes
Sprinkling freshly chopped herbs like parsley, cilantro, or chives over the chips just before serving gives them a fresh, vibrant lift. A light drizzle of olive oil or a sprinkle of sea salt can elevate the experience even more, enhancing their natural flavors.
Side Dishes
These chips shine alongside creamy dips like hummus, guacamole, or tzatziki. Their crisp texture pairs perfectly with smooth, cool dips, while a fresh salsa or a tangy yogurt-based dip adds a lovely contrast that’s hard to resist.
Creative Ways to Present
Try serving your baked chickpea chips in rustic paper cones for a party, or stack them on a colorful platter with various dips and garnishes for a visually inviting snack board. You can also crumble them over salads for a satisfyingly crunchy topping.
Make Ahead and Storage
Storing Leftovers
To keep your baked chickpea chips crisp, store them in an airtight container at room temperature. Properly stored, they stay fresh for up to 3 days, although they’re usually eaten up much faster!
Freezing
While freezing isn’t ideal for maintaining perfect crispness, you can freeze the baked chips in an airtight container if needed. Thawing them at room temperature and briefly reheating in the oven can help restore some crunch.
Reheating
If your chips lose some crispness, pop them into a preheated oven at 180°C (350°F) for 3-5 minutes. This quick reheat renews their crunch without drying them out or burning.
FAQs
Can I use other flours instead of chickpea flour?
Chickpea flour is unique for its flavor and texture in this recipe. Using other flours may not yield the same crispy and nutty results, but experimenting with gram flour or lentil flours could work with some adjustments.
How thin should I spread the batter?
Spreading the batter as thinly and evenly as possible helps achieve maximum crispiness. Aim for about 2 to 3 millimeters thick; thicker chips might be chewy rather than crisp.
Can I make these chips spicy?
Absolutely! Add chili powder, cayenne pepper, or crushed red pepper flakes to the batter or sprinkle on top before baking to give your chips a fiery kick.
Are baked chickpea chips gluten-free?
Yes, as long as your chickpea flour is certified gluten-free, this recipe naturally is gluten-free, making it wonderful for those with gluten sensitivities or celiac disease.
How long do these chips stay fresh?
Stored in an airtight container, these chips remain crisp and tasty for about 3 days, although they’re often gone before then thanks to their addictive crunch and flavor!
Final Thoughts
There’s something truly satisfying about crafting crunchy, flavorful snacks at home, and this Baked Chickpea Chips Recipe is perfect for just that. It’s simple, adaptable, and utterly delicious. I hope you enjoy making these chips as much as I do sharing them. Trust me, once you try them, they’ll be a beloved staple in your snack lineup for good!
Print
Baked Chickpea Chips Recipe
- Total Time: 25 minutes
- Yield: Approximately 2 servings (about 12-15 chips)
- Diet: Gluten Free
Description
Crispy and flavorful Baked Chickpea Chips made from simple ingredients like chickpea flour, water, and seasoning. These chips are a healthy, gluten-free alternative to traditional snacks, perfect for dipping or enjoying on their own.
Ingredients
Main Ingredients
- 80 grams chickpea flour
- 140 grams water
- ½ teaspoon salt
- Chopped fresh herbs, dried herbs, or spices (optional)
Instructions
- Preheat oven: Set your oven to 200°C (400°F) to prepare for baking the chips.
- Mix batter: In a bowl, combine the chickpea flour, water, and salt. Whisk the mixture thoroughly until you achieve a smooth batter without lumps.
- Prepare baking sheets: Line two baking sheets with parchment paper to prevent the batter from sticking and to ensure easy removal after baking.
- Shape chips: Spoon the batter onto the parchment paper, spreading it into thin circular shapes to get chip-like crispness.
- Add seasoning: Sprinkle your choice of fresh chopped herbs, dried herbs, or spices evenly over the batter circles for extra flavor.
- Bake: Place the baking sheets in the preheated oven and bake for approximately 10 minutes, or until the chips turn golden and the edges are lightly browned and crisp.
- Cool chips: Remove from the oven and let the chips cool for 15 to 20 minutes. This resting time ensures they firm up and become perfectly crisp for serving.
- Serve: Gently peel the cooled chips off the parchment paper and serve them as a snack with dips or enjoy them plain.
Notes
- For thinner and crispier chips, spread the batter as thinly as possible without breaking.
- Experiment with different herbs and spices like paprika, cumin, rosemary, or thyme to customize flavors.
- Store leftover chips in an airtight container to maintain crispness.
- Make sure to cool chips completely before storing to prevent sogginess.
- This recipe is naturally gluten-free and vegan-friendly.
- Prep Time: 5 minutes
- Cook Time: 10 minutes
- Category: Snack
- Method: Baking
- Cuisine: Mediterranean



Leave a Reply