
If you have ever wondered How to Make Coconut Whipped Cream Recipe that is both luscious and dairy-free, you are in for a treat. This dreamy topping is silky, subtly sweet, and packed with rich coconut flavor, making it the perfect addition to everything from pies and hot cocoa to fruit and pancakes. The best part is, it only takes a handful of simple ingredients and a little technique to transform chilled coconut cream into a cloud of fluffy delight that will elevate your desserts or snacks to new heights. Let’s dive right into this joyous, creamy masterpiece that’s as satisfying to make as it is to enjoy!
Ingredients You'll Need

Gathering the right ingredients is key to getting that perfect texture and flavor. Each ingredient here plays an essential role in delivering a creamy, sweet, and stable whipped cream with just the right balance of coconut goodness.
- Coconut cream or full fat coconut milk, chilled overnight: This is the star of the show, providing the rich fat content needed to whip into fluffy cream.
- Icing/powdered sugar (¼ - ¾ cup): Adds sweetness and a silky texture, and using organic ensures the recipe stays vegan-friendly.
- Vanilla extract (optional, ½ tsp): Just a touch enhances the natural flavors and adds a warm, comforting note.
How to Make How to Make Coconut Whipped Cream Recipe
Step 1: Chill Your Coconut Cream
The very first and most important step in How to Make Coconut Whipped Cream Recipe is chilling your coconut cream or full-fat coconut milk in the refrigerator overnight. This is crucial because it allows the cream to separate and solidify at the top of the can while the liquid settles at the bottom. Make sure to keep the can upright and avoid shaking or tipping it to encourage this separation. This step is the foundation of achieving a light, fluffy texture later on.
Step 2: Chill Your Mixing Bowl
To get that perfect whip, chill your mixing bowl in the refrigerator for about 10 minutes before you begin. A cold bowl helps the cream maintain its structure as you whip, similar to whipping dairy cream, so don’t skip this! It’s a simple trick that makes a big difference in your results.
Step 3: Scoop Out the Cream
Carefully open your can of chilled coconut cream or milk without shaking and scoop out only the solidified cream into your cold bowl. Leave the liquid behind — don’t toss it! This leftover coconut water is great for smoothies or other recipes, so it’s a win-win.
Step 4: Whip the Cream
Start by beating the hardened cream on medium speed for about 30 seconds until it becomes creamy. Then add your vanilla extract if using, and gradually mix in the powdered sugar. Whip for another minute or so until smooth and fluffy, but be careful not to overwhip, as that can cause the cream to break and separate. If the coconut milk didn’t thicken properly, some tricks like adding a little tapioca flour can help salvage your batch.
Step 5: Taste and Adjust
Give your whipped cream a quick taste and adjust the sweetness if needed. You can always add a bit more powdered sugar to make it sweeter or extra vanilla for more depth. Your personalized coconut whipped cream is now ready to use or chill further for an even firmer texture!
How to Serve How to Make Coconut Whipped Cream Recipe

Garnishes
This coconut whipped cream is incredibly versatile when it comes to garnishes. Sprinkle a dash of toasted coconut flakes, a bit of cinnamon, or even some finely grated dark chocolate to add texture and flavor contrast. Fresh berries or a twist of citrus zest can also complement the natural creaminess beautifully.
Side Dishes
Think beyond just desserts! This whipped cream pairs wonderfully as a topping for warm pancakes, waffles, or French toast, adding an indulgent touch. It also works well alongside fruit salads, mousse, or even dolloped atop a rich hot chocolate for a dairy-free twist that impresses every time.
Creative Ways to Present
Presentation is half the fun! Try piping the coconut whipped cream into elegant swirls atop your desserts or layer it between fruit or cake in parfait glasses. You can also serve it in small ramekins with a drizzle of berry coulis or espresso syrup for a sophisticated treat. The fluffy texture and beautiful sheen make it a joy to decorate with.
Make Ahead and Storage
Storing Leftovers
If you happen to have leftovers, no worries! Store your coconut whipped cream in an airtight container in the refrigerator. It tends to harden with time but can be gently stirred or whipped again to bring back its fluffy texture. It will keep well for 1 to 2 weeks, making it perfect for prepping ahead of a party or special occasion.
Freezing
Freezing coconut whipped cream is possible, but be prepared for some texture changes as ice crystals form. If you freeze it, thaw it slowly in the refrigerator and then whip it again briefly to revive some of the fluffiness. It’s handy for making larger batches if you want to keep some on hand.
Reheating
Since this whipped cream is best served cold, reheating isn’t typically recommended. However, if it has firmed up too much in the fridge, simply let it sit at room temperature for a few minutes and then whisk it gently to soften. It’s ready to be enjoyed again in no time.
FAQs
Can I use regular coconut milk instead of coconut cream?
You can try using full-fat coconut milk, but it must be well chilled overnight to separate properly. Coconut cream has a higher fat content, which makes whipping easier and the texture creamier, so it often yields better results.
Why didn’t my coconut cream whip properly?
This can happen if the coconut milk didn’t chill long enough or if the fat content in the can is too low. Also, avoid shaking the can before opening. If you get a “dud” can, adding a bit of tapioca flour during whipping can sometimes help achieve the right consistency.
Is this recipe vegan and dairy-free?
Absolutely! Using coconut cream and organic powdered sugar makes this whipped cream completely vegan and dairy-free, providing a perfect alternative for those with dietary restrictions or anyone avoiding animal products.
How long will the whipped cream hold its texture?
When properly chilled, coconut whipped cream can hold its structure beautifully for several hours at room temperature and up to 1-2 weeks in the fridge. Just give it a quick whisk if it starts to firm up too much before serving.
Can I flavor the whipped cream with other extracts?
Definitely! Vanilla is classic, but you can experiment with almond, peppermint, or even a splash of citrus zest or liqueurs to create unique flavor profiles for different desserts.
Final Thoughts
Now that you know How to Make Coconut Whipped Cream Recipe, it’s time to grab a can of coconut cream and enjoy creating this simple yet luxurious topping. It’s a total game-changer for anyone looking to add a bit of creamy magic to their dishes without dairy. From easy make-ahead prep to endless serving possibilities, you’ll find this coconut whipped cream becoming a staple in your kitchen and your heart. Give it a try and watch your everyday desserts transform into memorable treats!
Print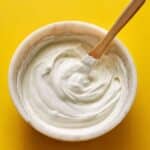
How to Make Coconut Whipped Cream Recipe
- Total Time: 10 minutes (plus overnight chilling)
- Yield: 6 servings
- Diet: Vegan
Description
This Coconut Whipped Cream recipe offers a luscious, dairy-free alternative to traditional whipped cream, perfect for topping desserts or enhancing your favorite sweet treats. Made from chilled full-fat coconut cream or milk, it whips up into a creamy, fluffy topping with just a touch of sweetness and optional vanilla flavor. Quick to prepare and vegan-friendly, this whipped cream keeps well in the fridge and adds a rich tropical twist to pies, hot cocoa, ice cream, and more.
Ingredients
Whipped Cream
- 1 (14-ounce) can coconut cream or full-fat coconut milk, chilled overnight
- ¼ to ¾ cup icing/powdered sugar (organic recommended for vegan option)
- ½ teaspoon vanilla extract (optional)
Instructions
- Chill the Coconut Cream: Place the can of coconut cream or full-fat coconut milk in the refrigerator overnight without shaking or tipping to allow the cream and liquid to separate properly.
- Prepare the Mixing Bowl: Chill a large mixing bowl in the refrigerator for about 10 minutes before starting to whip to help maintain the cream’s cold temperature.
- Scoop Out the Cream: Carefully remove the coconut cream from the chilled can without shaking it. Open the can and scoop out the thickened cream on top, leaving the liquid behind (which can be saved for smoothies).
- Troubleshoot if Needed: If the coconut milk hasn't thickened properly, it may lack enough fat content. To salvage, add 1 to 4 tablespoons of tapioca flour during the whipping process to help achieve the desired consistency.
- Whip the Cream: Place the thickened cream into the chilled bowl. Beat with an electric mixer for 30 seconds until creamy. Add vanilla extract (optional) and powdered sugar or stevia, then continue mixing for about 1 minute until smooth and fluffy. Avoid overwhipping to prevent separation.
- Store or Use: Use the whipped cream immediately as a topping or refrigerate it to firm up further. It will set more as it chills and can be kept in the refrigerator for 1 to 2 weeks.
- Serving Suggestions: Perfect as a topping for pies, hot cocoa, ice cream, French toast, or as a component in pie fillings, mousse, and no-churn ice cream recipes.
Notes
- Use organic powdered sugar to keep the recipe vegan-friendly.
- Do not shake or tip the can before opening to ensure separation of cream and liquid.
- Reserve the liquid left behind for use in smoothies or other recipes.
- If coconut cream doesn’t solidify, use tapioca flour (1-4 Tbsp) to help with whipping.
- Avoid overwhipping to prevent the cream from separating.
- Chilling the mixing bowl before whipping helps achieve better volume and texture.
- Refrigerate the whipped cream to firm it up and improve stability.
- Prep Time: 10 minutes
- Cook Time: 0 minutes
- Category: Dessert Topping
- Method: No-Cook
- Cuisine: Vegan/American


Leave a Reply